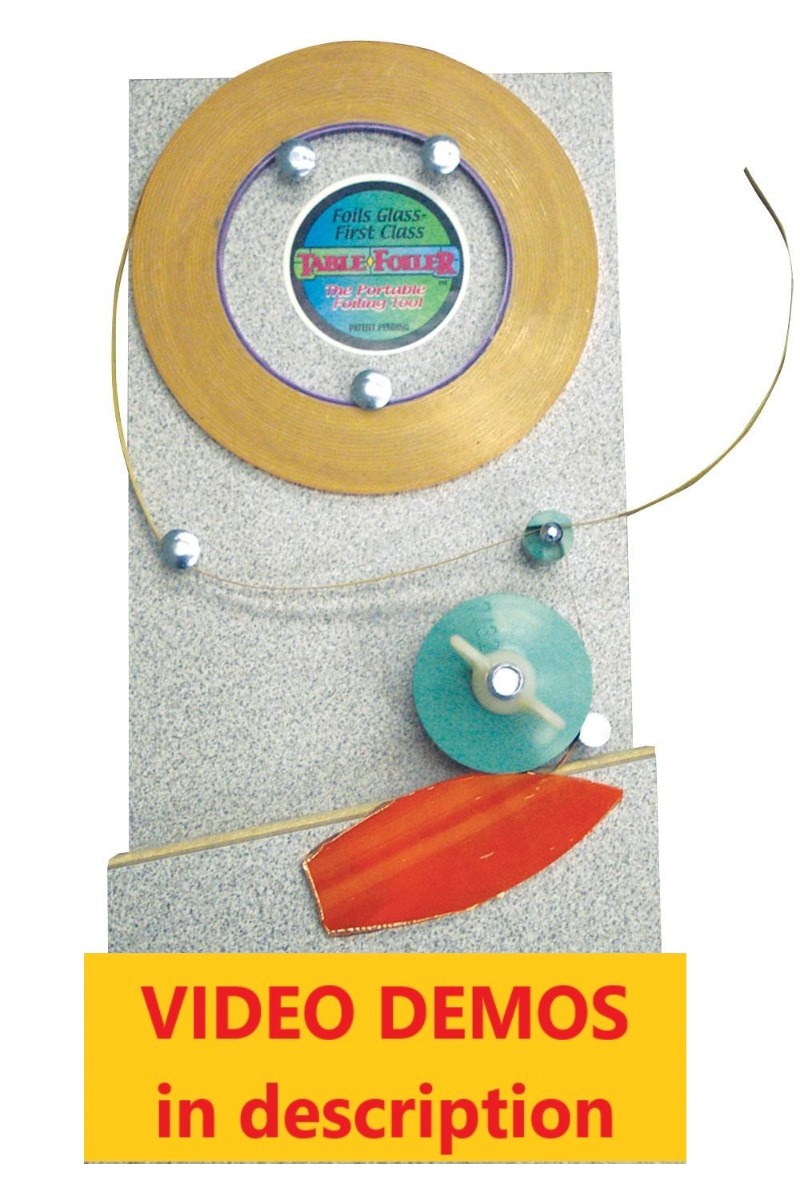
The Table Foiler creates a flat, sturdy work surface that adds foiling control for even the most intricate foiling projects. See How-to Videos below.
Guide the glass into the roller and rotate the glass piece until the foil tape has been applied. You’ll be able to foil more quickly, consistently, and precisely than ever before.
There is a short time period required to learn the proper technique for applying the foil with the Table Foiler. Once the learning period has been completed you will enjoy perfect foiling, time after time. Plus the added bonus of accuracy and speed.
Features
Use with 3/16, 7/32, or 1/4 inch copper foil tape
Three roller sizes included: 3/16, 7/32, and 1/4 inch.
Flat and sturdy for safe and controlled application
Detailed instructions and tip chart included
Use with 1/8" thick art glass
Use for regular size pieces up to one-foot square, sharp inside curves, very small pieces, jewels, and nuggets
Table Foiler size: 12 long x 6 wide x 3-1/4" high
Made in the USA
Table Foiler Instructions.Click HEREClick HERE to hide the insturction, or HERE to view and print.
SETUP
1. Remove and discard BLACK CAP on the bolt and LABEL on the table 2. SELECT ROLLER SIZE. Slip notch on bottom of roller past guide #2 3. INSTALL WING NUT & ADJUST ROLLER HEIGHT until glass (flat on table) is centered in rubber “O” ring. For best viewing of this adjustment, tilt foiler on its right side and sight along angled edge of table and push in a corner of glass. See lower side view. 4. INSTALL FOIL ROLL of same side as roller over 3bacl guide (back 2 first) so foil unrolls off left side. 5. PULL FOIL with backing around and past the guide #1 about 6 inches. 6. Before trying to separate foil from backing (the first fee time, at least) lay something (like scissors, fid, scrap glass) on top where it unrolls. Separate 2 to 3 inches of foil from backing and SLIDE ONLY THE FOIL INTOTHE SLOT (with no backing) between roller 7. SLIDE FOIL (with backing) between roller and guide #2. Pull foil into it fits smoothly against the roller ridges 8. CUT OFF FOIL with scissors between roller and table near narrowest point where routed edge ends (7 o’clock). See #11 about cutting.
TEST FOIL & FOIL
9. TEST crimp foil width on a scrap of glass you will be using. Fine tune roller height if necessary but GLASS MUST HIT O’RING 10. START on a corner of glass at end of foil and with FIRM PRESSURE against “O” ring (you cannot break anything, and too little pressure will not crimp completely), move glass piece to left keeping it CONTINUOUSLY IN CONTACT with “O” ring. Keeping some portion of glass flat on table AT ALL TIME. Stay in front of roller (5 to 7 o’clock) as much as possible throughout foiling by turning glass. Some shaped pieced require using the 7 to 9 o’clock part of roller but be sure to keep up the pressure on the “O” ring and some portion of glass flat on the table 11. GO AROUND GLASS until you overlap the beginning foil a little. The stopping point should near the end of the routed edge (7 o’clock). Pull glass slightly toward you and cut off foil with scissors. Try to cut so end of foil stays between roller ridges and is in position for the next piece of glass. If it doesn’t you can easily turn foil roll backwards (clockwise) to move end of foiler nearer guide #2 or adjust foil with you fingers or scissors to get it back against ridges. For CHANGING FOIL SIZE. Begin at #2 again. FINISH CRIMPED FOIL BY BURNISHING.
TIPS:
12. Stained glass is quite variable in thickness, even on the same piece of glass. The rollers are made to crimp the foil as its intended thickness of 1/8 inch. Too thick and the foil may be cut and too thin will change the crimped width between the two side of glass. See #13, #14, #15. 13. MOST FOIL DEFECTS can be fixed by running though foiler again in defective area and perhaps not pushing so hard the 2nd time. If roller does not crimp bottom of foil and table folds foil the wrong way, you can usually hand fold foil back after finishing piece. 14. CUT FOIL usually means roller height needs adjustment or glass too thick in cut area. Adjust height or do not push so hard. See #13. 15. HAND CRIMP is: crimping foil between your thumb and finger (top and bottom of glass) as it comes off roller before partially foiled piece comes back over table. It is EASY TO DO and is used when foil is not being crimped m=normally, usually because of too little is inconsistent pressure against roller OR glass thickness has kept it from hitting “O” ring. If top does not crimp, bottom usually doesn’t either, so I tis easy to see when to hand crimp. 16. DO NOT SHARP INSIDE CURVES during normal foiling by pulling glass with foil past curve (don’t let foil stick to end of curve), then push foil into curve with finger or stick, then hand crimp before continuing normal foiling. 17. For VERY SMALL PIECES push piece into roller where table is closer to roller until it crimps, then pull piece back and rotate it in the usual direction, then push again until it crimps. Repeat until done. 18. Do JEWELS and PRISMS with flat side against table. Do NUGGETS by loosening wing nut letting roller move freely up and down. Then foil by turning nuggets against roller. Don’t push hard on nuggets because roller sides could e pushes apart. 3/16” roller it too narrows for most nuggets. 19. Some foils have STICK SIDES and foil pulls hard at roller and may even break foil. Put powder (like talcum powder) on base under foil roll to make it run easier. 20. A limited number of ¼” rollers are available that have a wide throat that is good for ripped and thicker glass that will not fit into the ¼” roller that is furnished. See your local stained-glass dealer. 21. The “Magic Cutter” is available now. It is faster and easier to use than scissors. It adjusts roller height and consistently leaves the foil in the roller ridges for the next piece of glass. A foil saver, time saver and money saver.